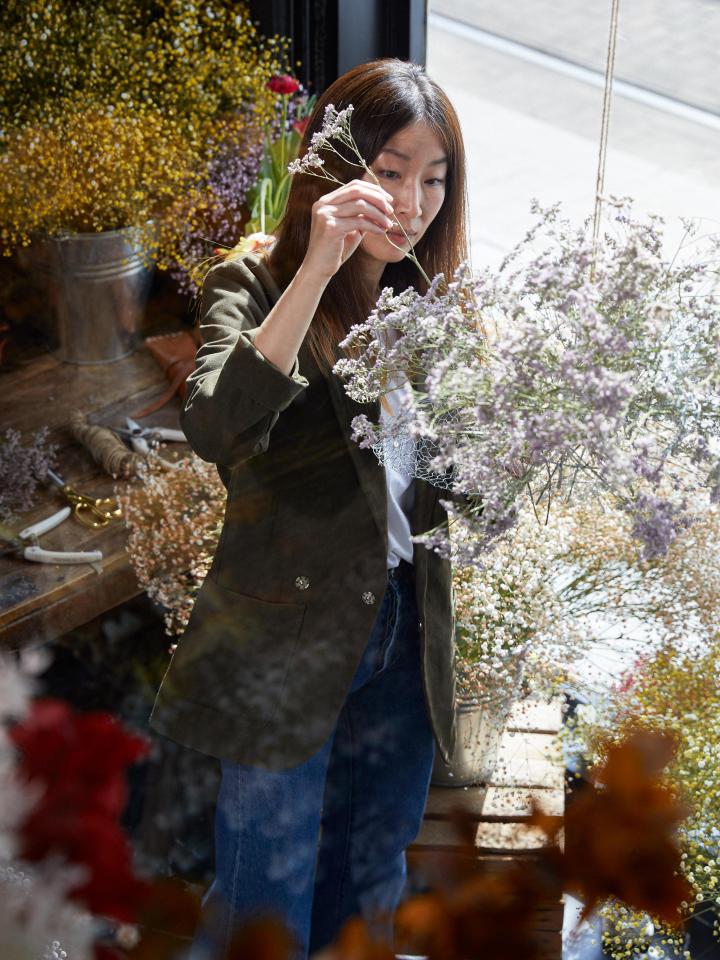
A flower cloud is one of the signature pieces of renowned floral stylist Yoko Negi. And the great thing is that it's easy to make at home! Discover below how to create your own flower cloud in just a few steps.
FLORAL STYLIST YOKO NEGI
Japanese floral stylist Yoko Negi is known for her beautiful floral creations. Yoko not only makes the most beautiful, bouquets, garlands and window designs, but also works together with exhibitions and photographers. Yoko's clients are mainly located in Europe and Asia. She can be found in Paris, Rotterdam and Tokyo, where she shares her passion and knowledge through workshops.
MAKE A FLOWER CLOUD YOURSELF
A flower cloud is not only Yoko's signature piece, but is one of her favourite floral creations. And we get it! You can make this timeless eye-catcher exactly as you like and vary its shape, size and choice of flowers endlessly. As far as colour goes, anything goes: create a harmonious whole by using colours that flow into one another, choose flowers in the same colour tones, or make a playful combination with bright colours. Also fun: use typical seasonal flowers in your flower cloud and vary them according to the season.
you will need
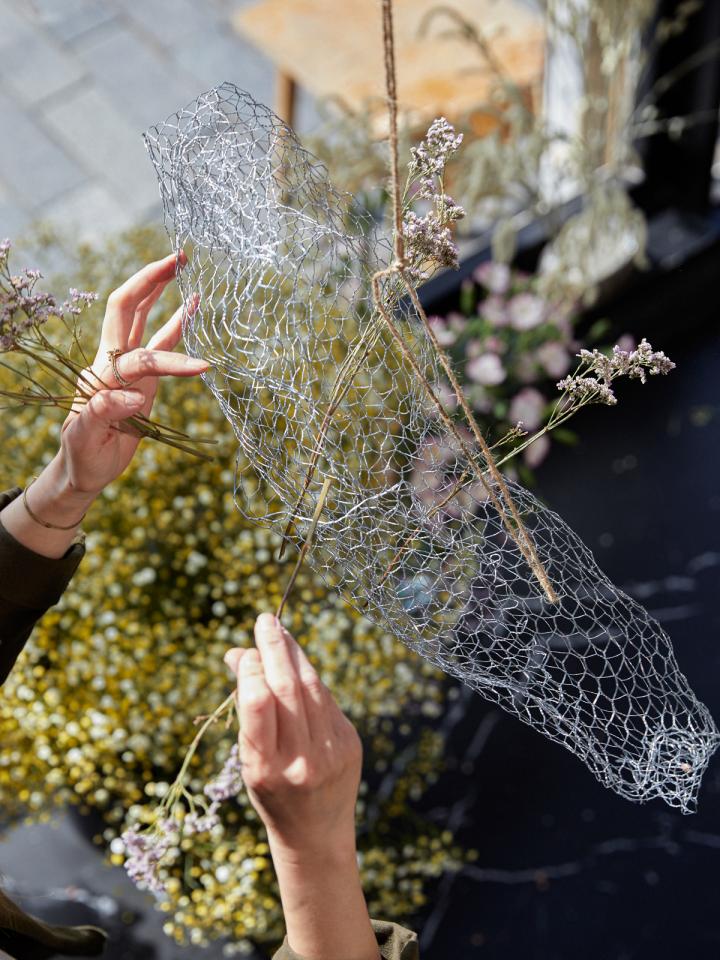
- Chicken wire
- Pruning shears
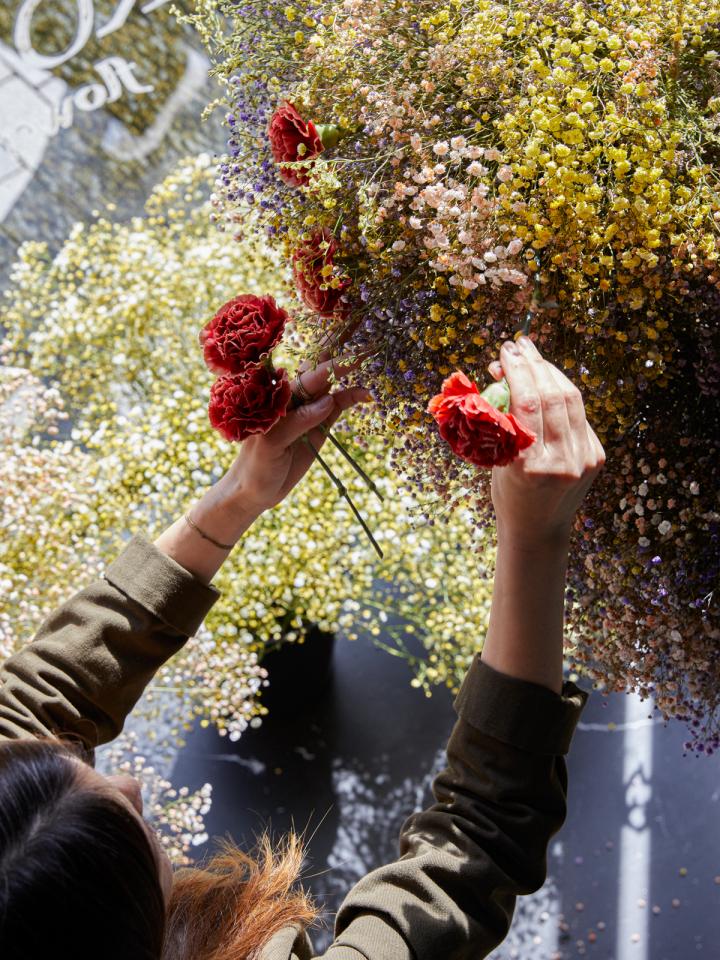
- Fresh flowers of your choice. Tip: Choose flowers that stay beautiful when dry. In this example Yoko used carnations, craspedia and lathyrus.
- Dried flowers of your choice. In this example, Yoko used limonium and gypsophila, among others.
- Fixing material, depending on how and where you want to hang your flower cloud. Think of rope or wire, screw hook etc.
- Optional: Make your own 'flower laboratory' and use natural, organic dye to give your flowers the colour you want. The longer you leave a flower in dye, the more colour it will get.
HOW TO MAKE A FLOWER CLOUD
Step 1
Think about how you want to make your floral dream a reality. Gather all the supplies and visit your local florist for fresh (and dried) flowers, or dry your flowers yourself.
Step 2
Cut the chicken wire to your desired size and bend the wire until you are satisfied with the shape. Let your imagination run wild! To make it easy to work with, it is handy to temporarily hang the wire netting on a rope that you attach to the ceiling. If possible, do this right where you want to hang the flower cloud permanently.
Step 3
Insert the flower stems into the chicken wire. If necessary, you can cut off a piece of the flower stalk. Play with colour until you have achieved the desired look.
Step 4
Hang your flower cloud in a nicely prominent place in your home. For example, in the hallway, above the dining table or next to your sitting area.
Step 5
Let nature do its work and see how the flower cloud slowly drie. If there are any empty spaces in the chicken wire because the fresh flowers have dried out, you can put some extra dried flowers in there.
We are very curious to see your end result! Share it on Facebook or Instagram with the hashtags #funnyhowflowersdothat and #floralsignatures.
more Floral Signatures
Keen to make this signature piece? Discover the floral signature of A.P Bloem and get to work on a still life made of flowers. And for a daily dose of floral inspiration, follow us on Instagram, Facebook and Pinterest.