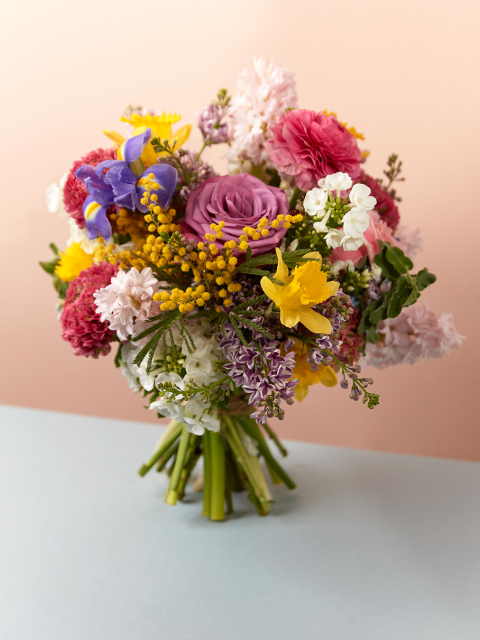
Equipment
- 15 flowers stems
- Scissors
- String
- Ribbon
Method
- Choose your stems. We recommend picking up to 15 across a variety of different spring flowers, with an assortment of shapes and sizes. This will enable you to create a layered mixture, rich with colour and scent. Read our breakdown of the best Spring flowers to use but daffodil, ranunculus, hyacinth and iris are always good options
- Remove all foliage from below the water line
- Lightly holding the stems two-thirds of the way down, begin arranging your flowers by spiralling the stems to form a rounded shape. Using a spiralling formation will give the bouquet a full appearance when displayed in the vase
- Once your arrangement is complete, cut each stem to the same length to allow them an equal share of the water. Make sure to cut the stems at an angle. If the stem is flush, it will sit flat at the bottom of the vase and won't be able to drink water
- Loop string around the bouquet a few times and tie securely.
- Decorate the bouquet with a ribbon
Check out the other films in our Spring Senses series, Touch and Taste.
Send us a picture of your Spring bouquet frame on Facebook or Twitter!